


I went to college because I wanted to learn how to make prosthetics, and when I was there, I met many like-minded creatives.
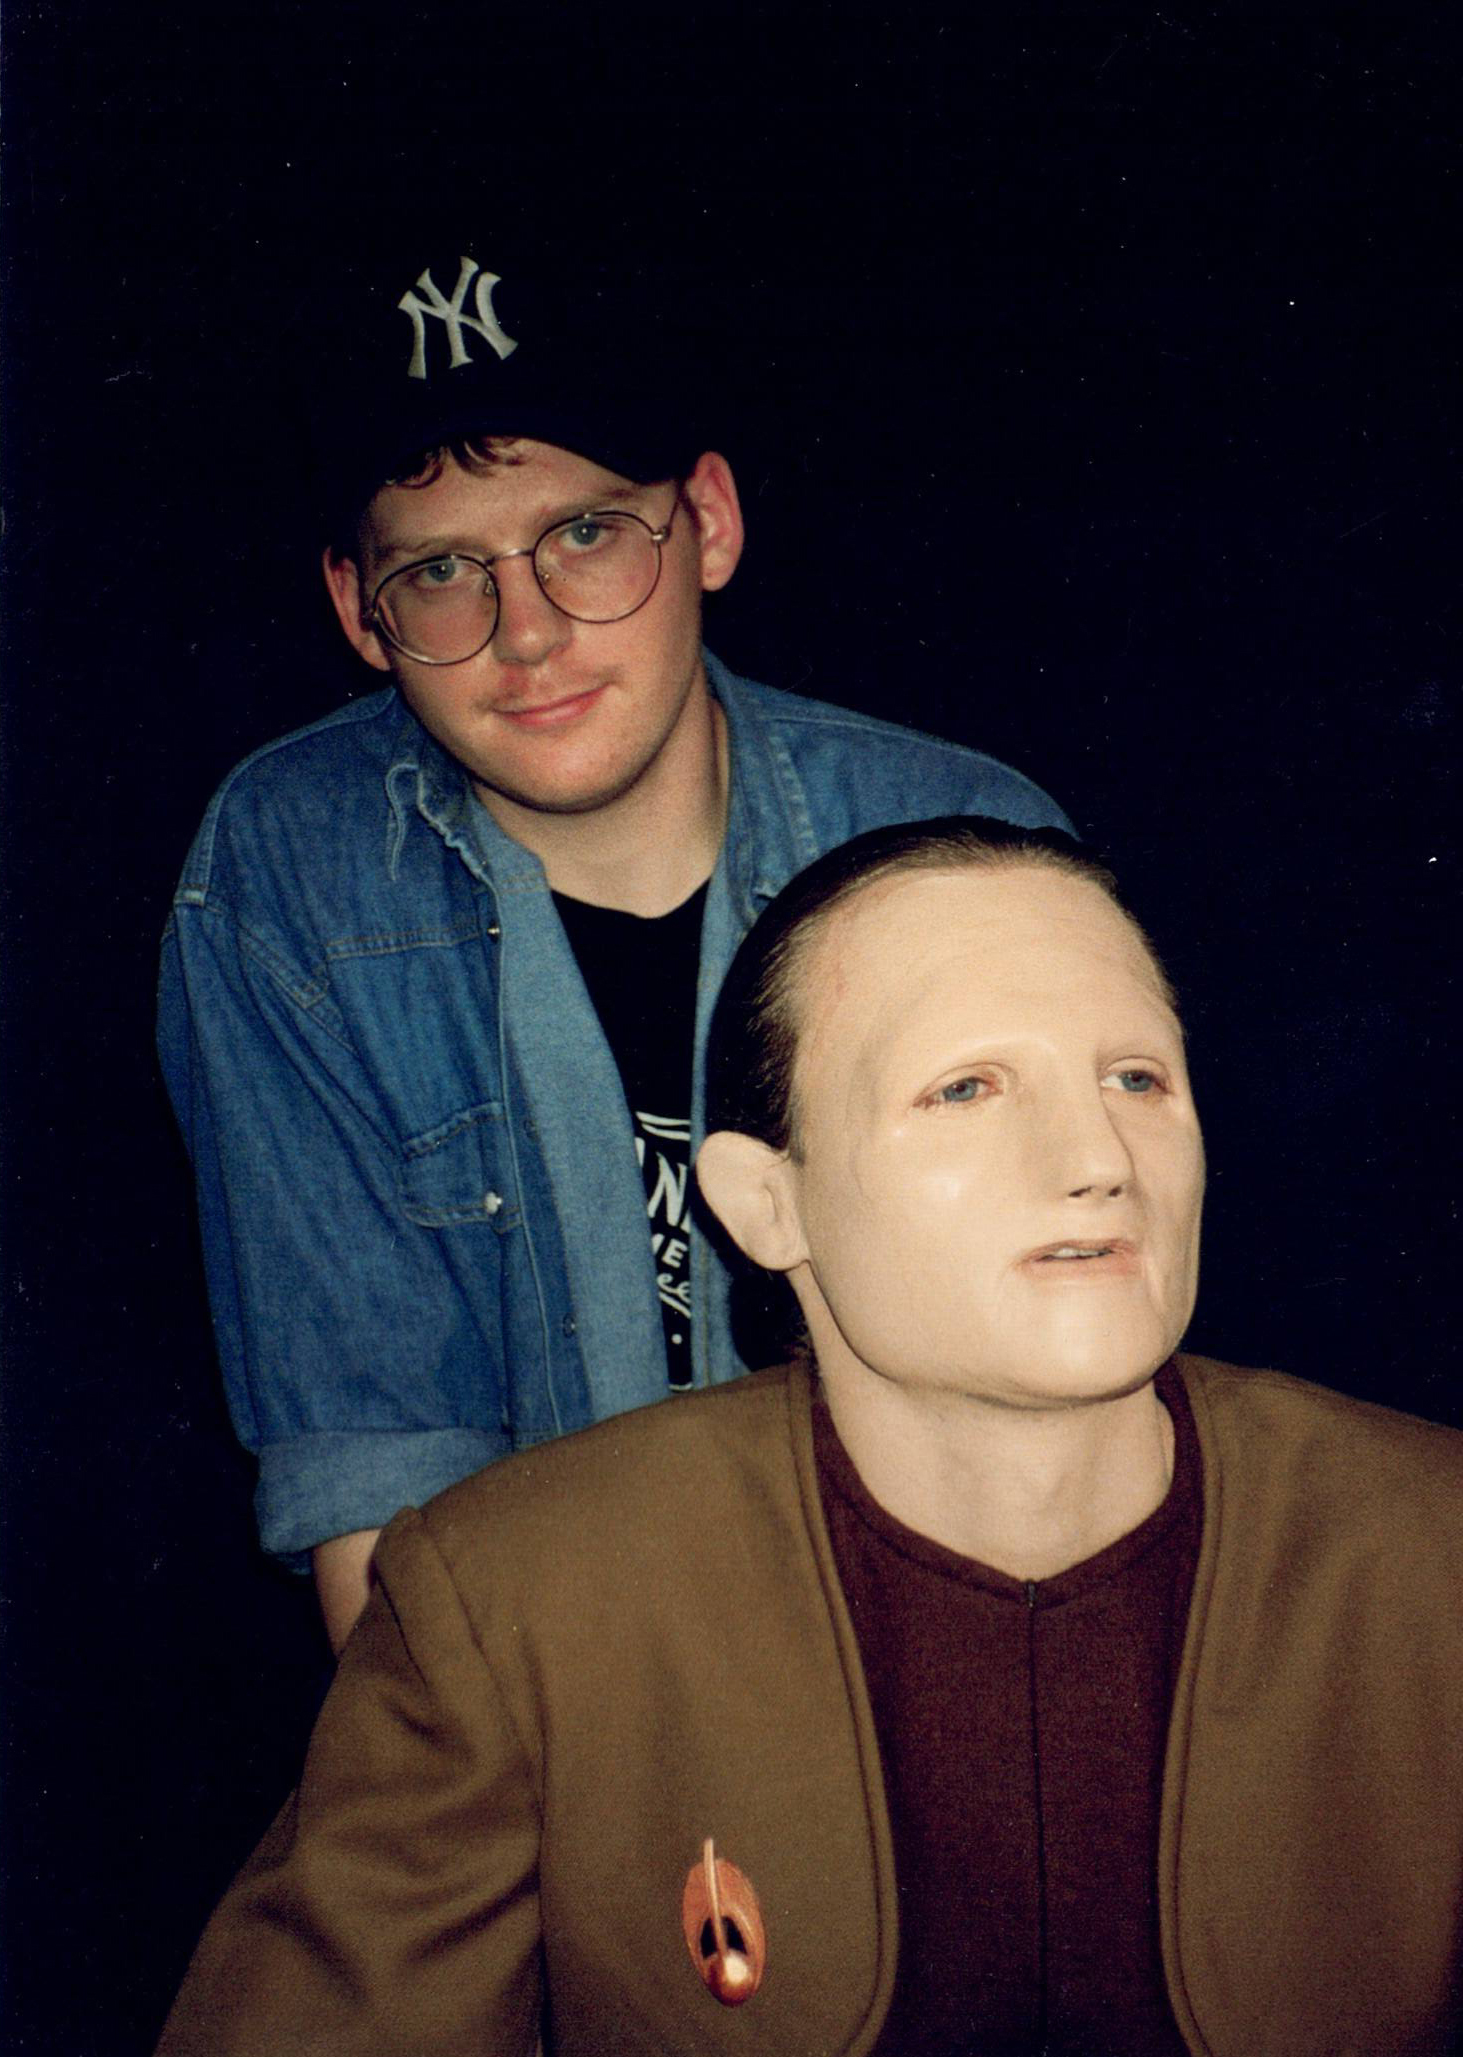
One friend I made was Lee – a Star Trek nerd who had the idea to recreate the costume and makeup of Odo, the changeling Chief of security, played by René Auberjonois in the new TV show Deep Space Nine.
Designed by the legendary Michael Westmore (check out our podcast #34 with Michael), it is a neat take on the shape-shifter idea that has smoothed, almost blank features with reduced details and textures.
To listen to the podcast, you can stream or download from here, or simply subscribe through your favourite podcast app – we are on many, including Spotify, Apple Podcasts, Soundcloud, IHeartRADIO , STITCHER , Luminary and Google Podcasts.

At the time, I knew very little of Star Trek and not nearly enough about how I could make appliances, but I took what little I knew and tried.
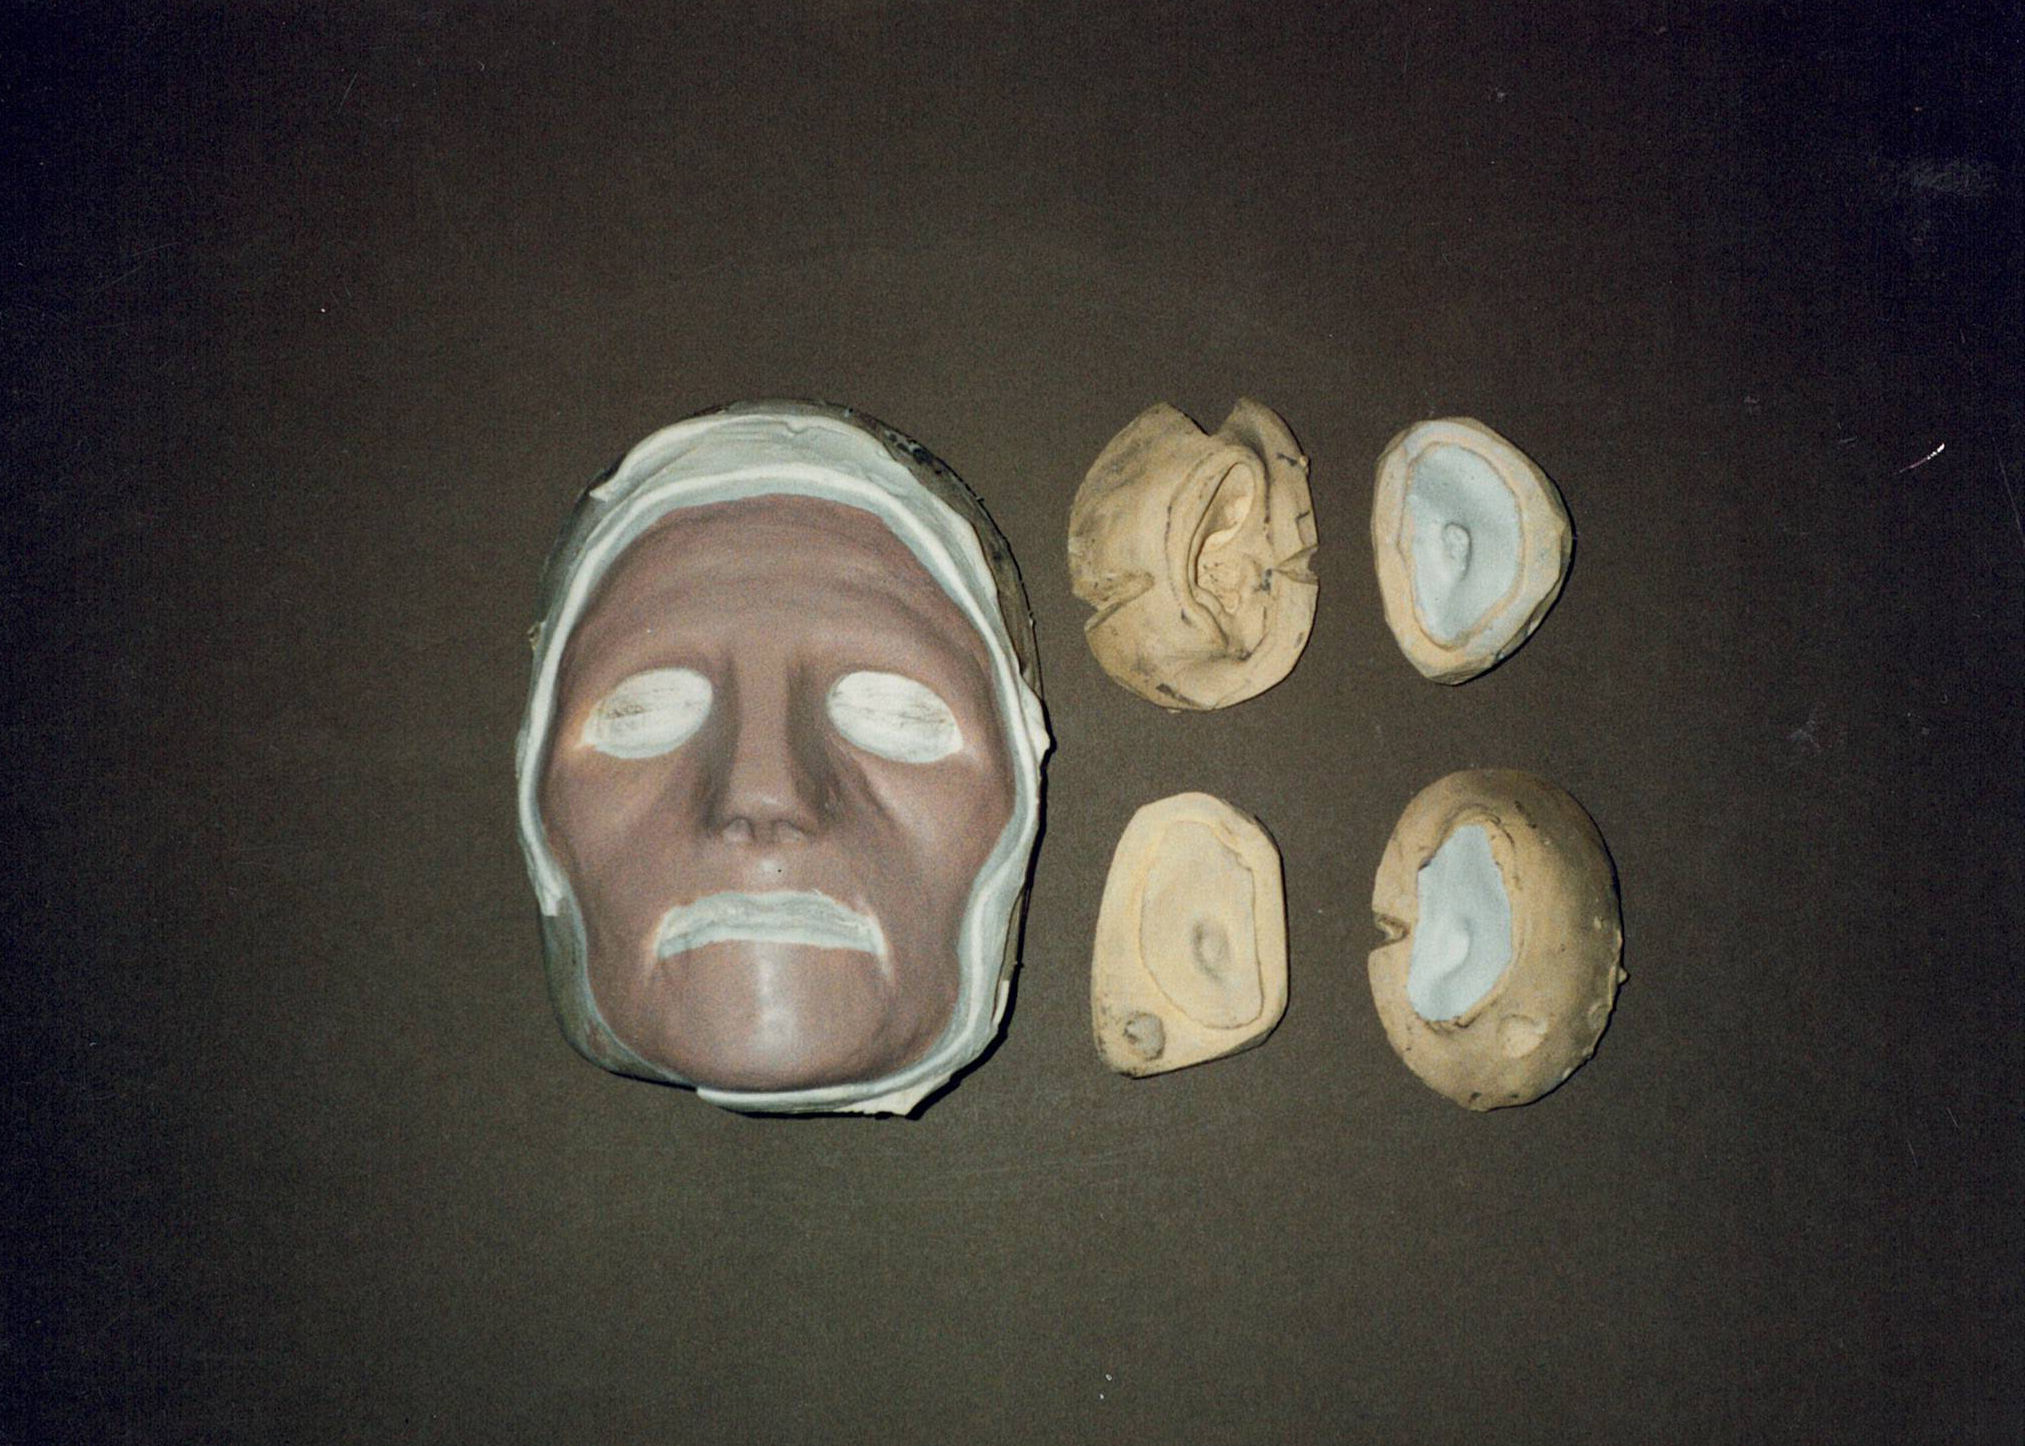
Recently, our mutual friend Adrian Rigby found these prints and a spare foam I’d run in the face mould, which is about 30 years old! This project was something we did in my first year of college and so that can carbon date it pretty squarely.
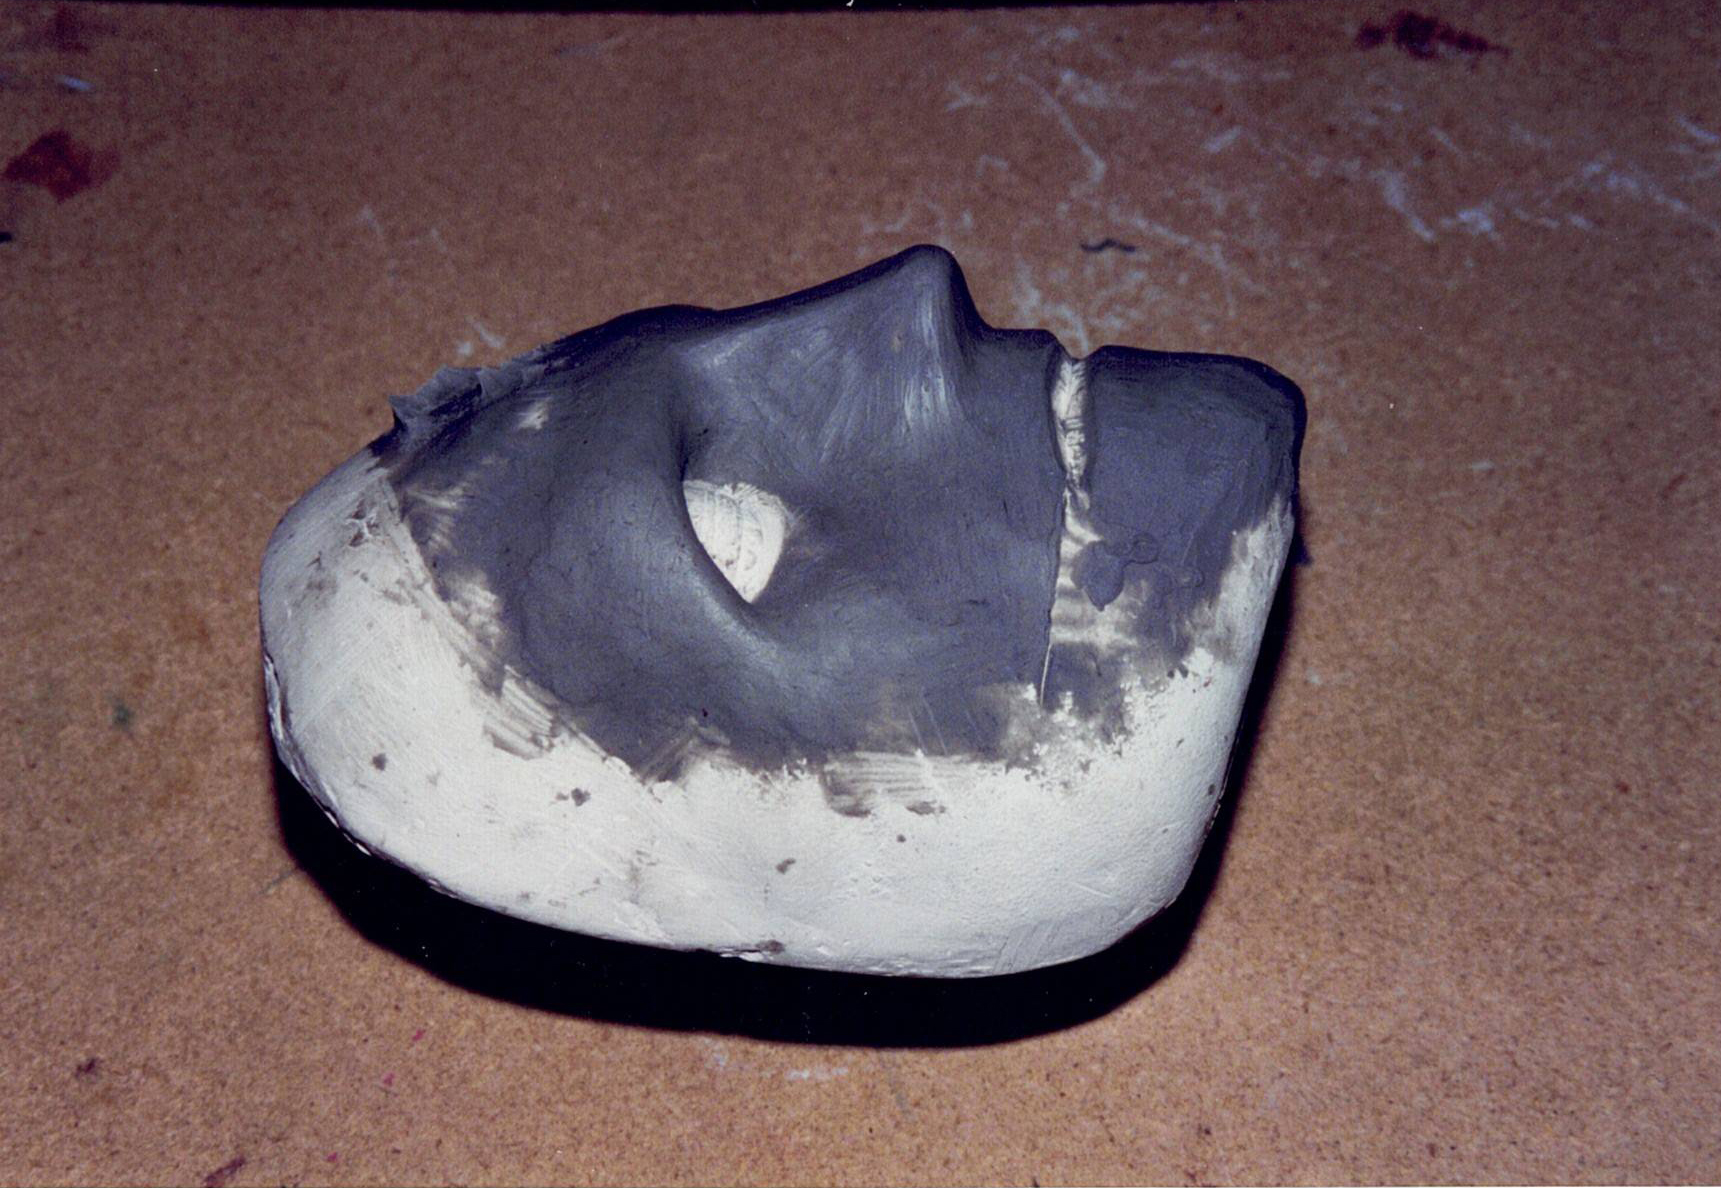
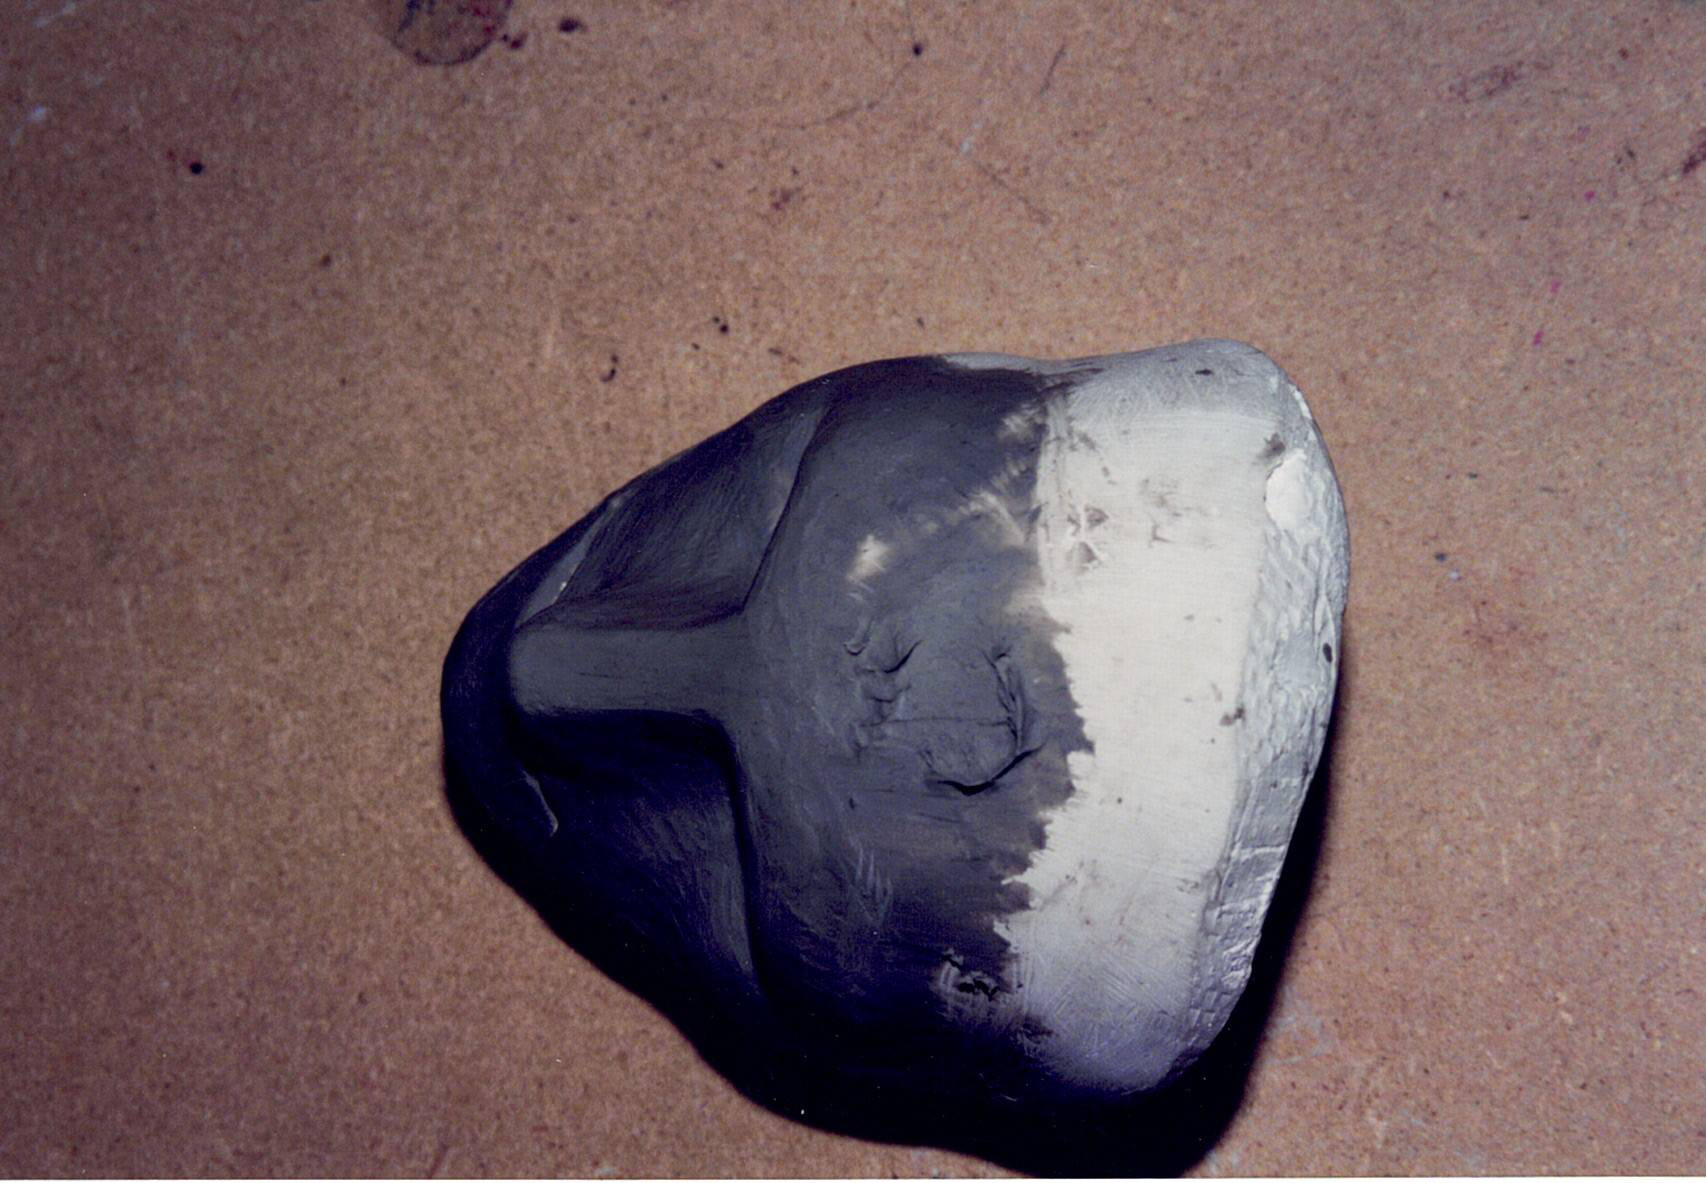
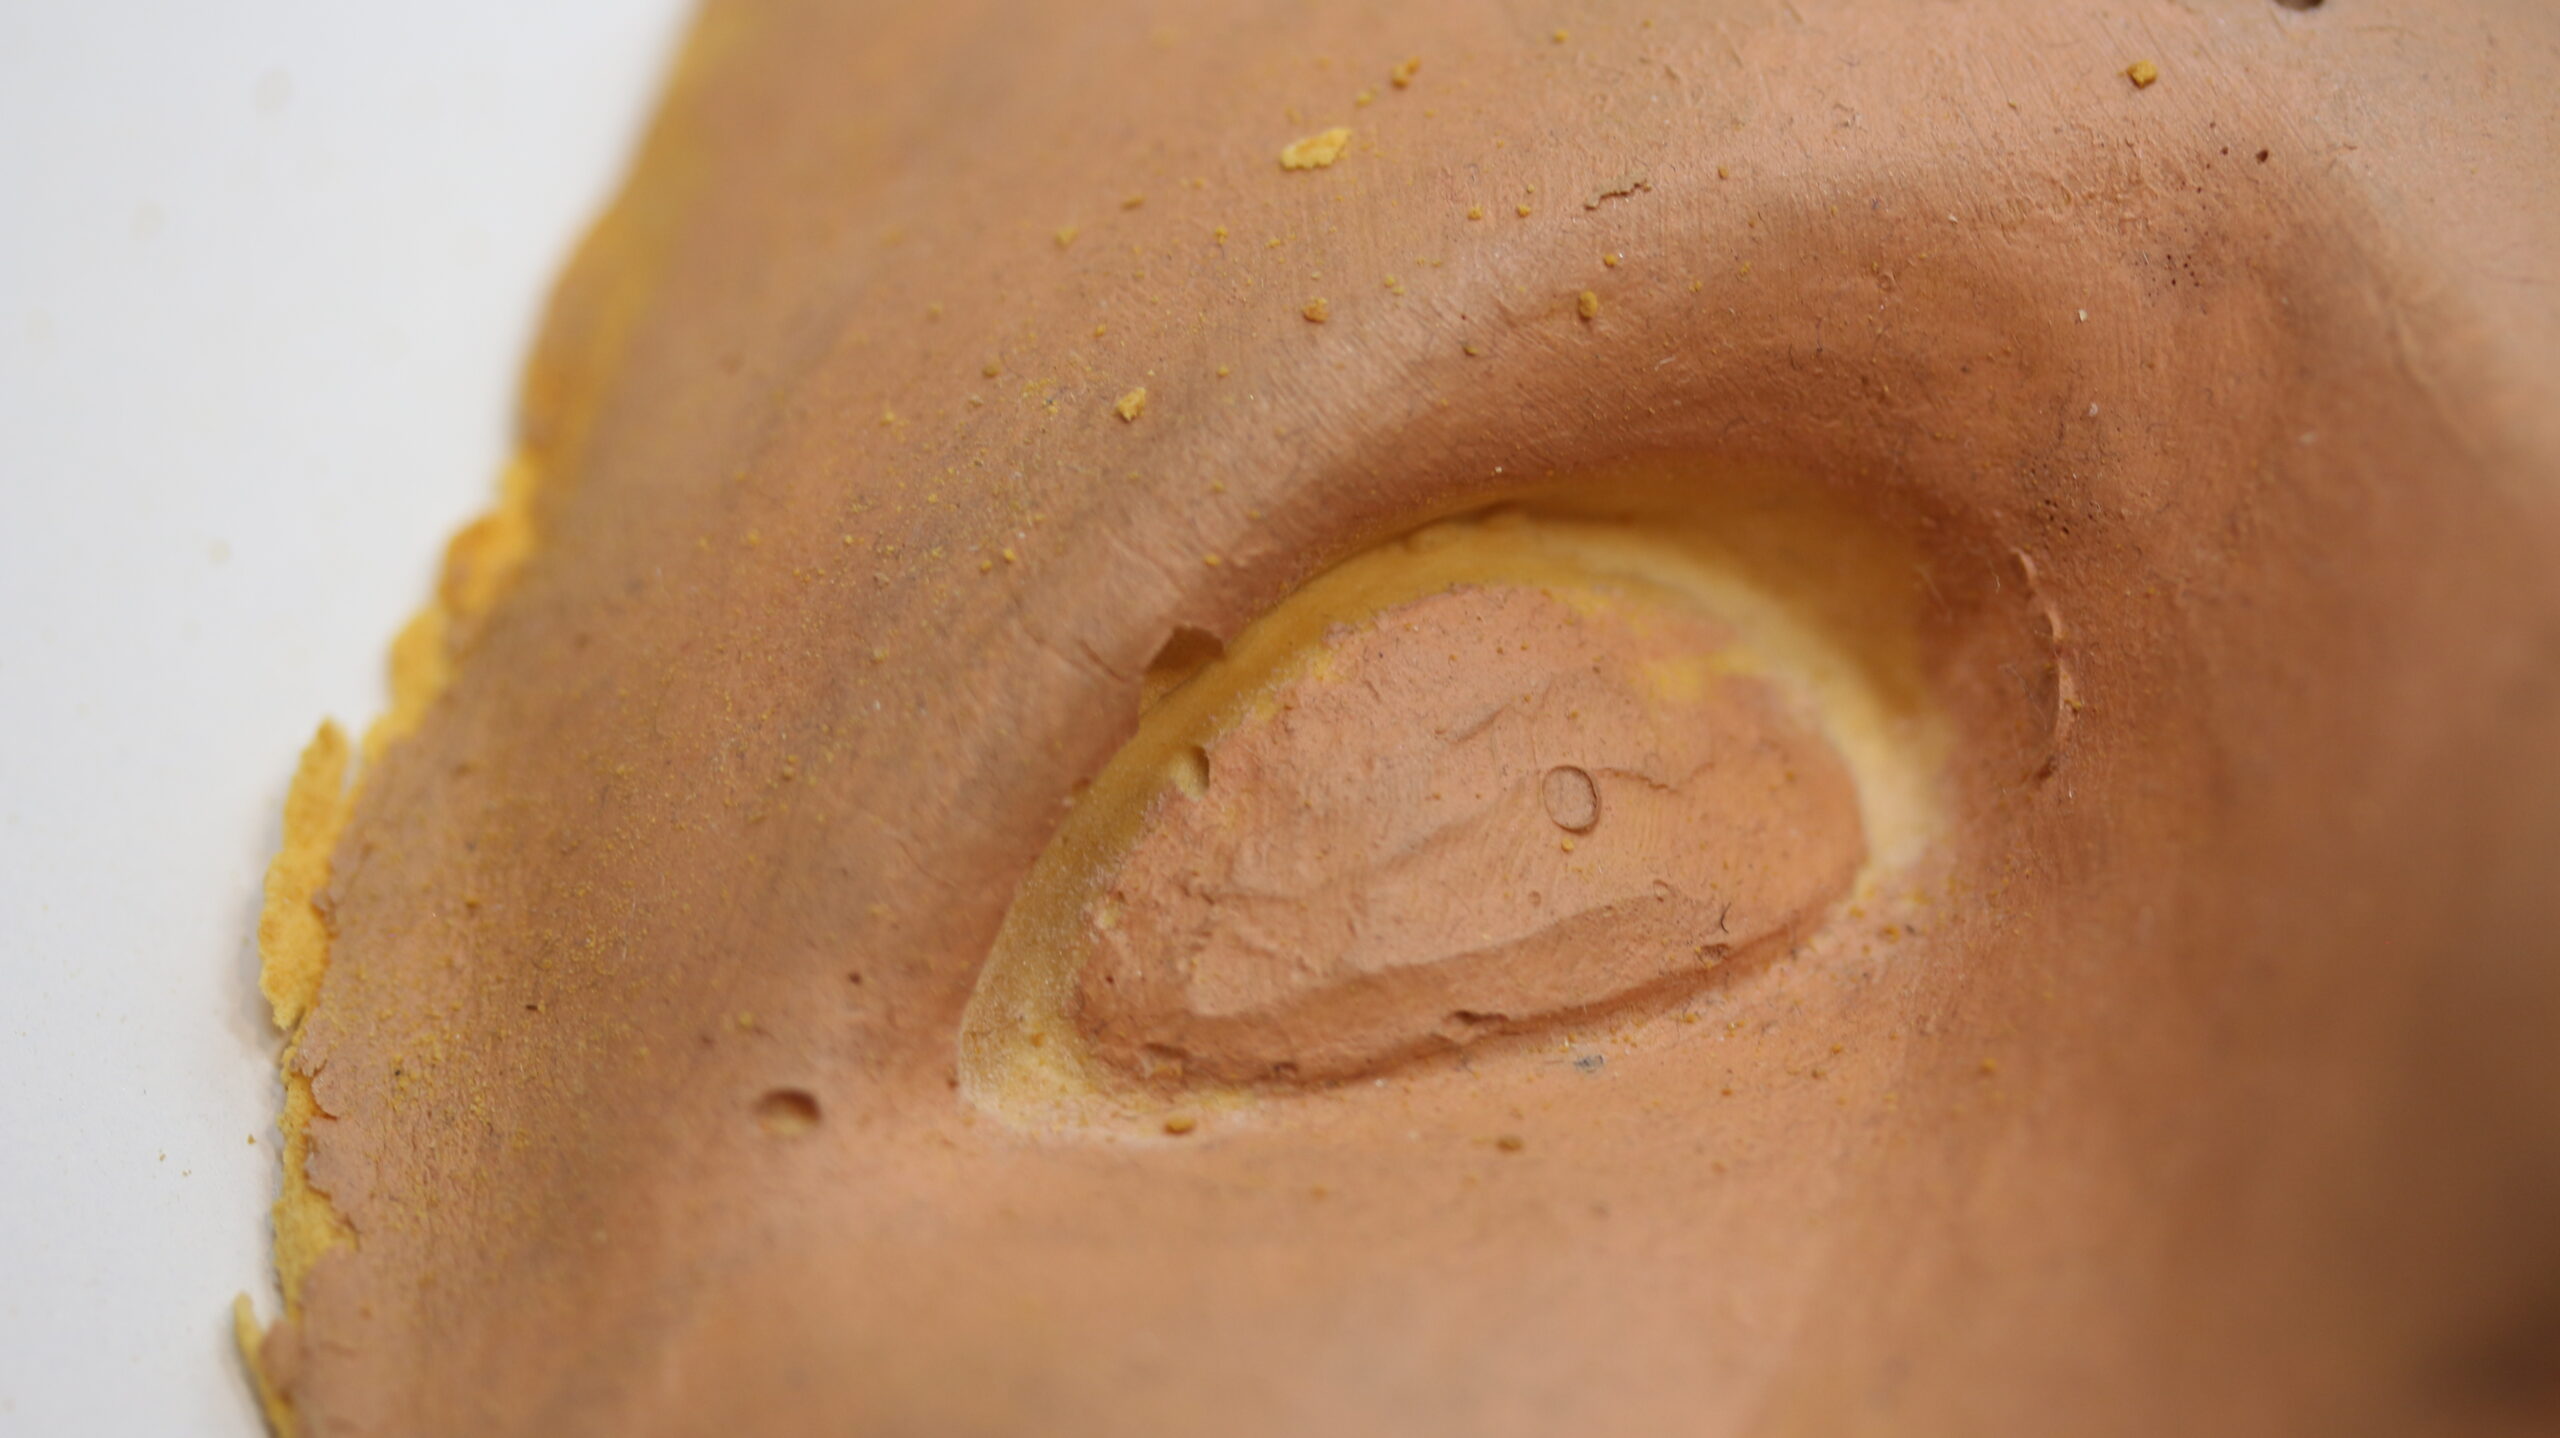
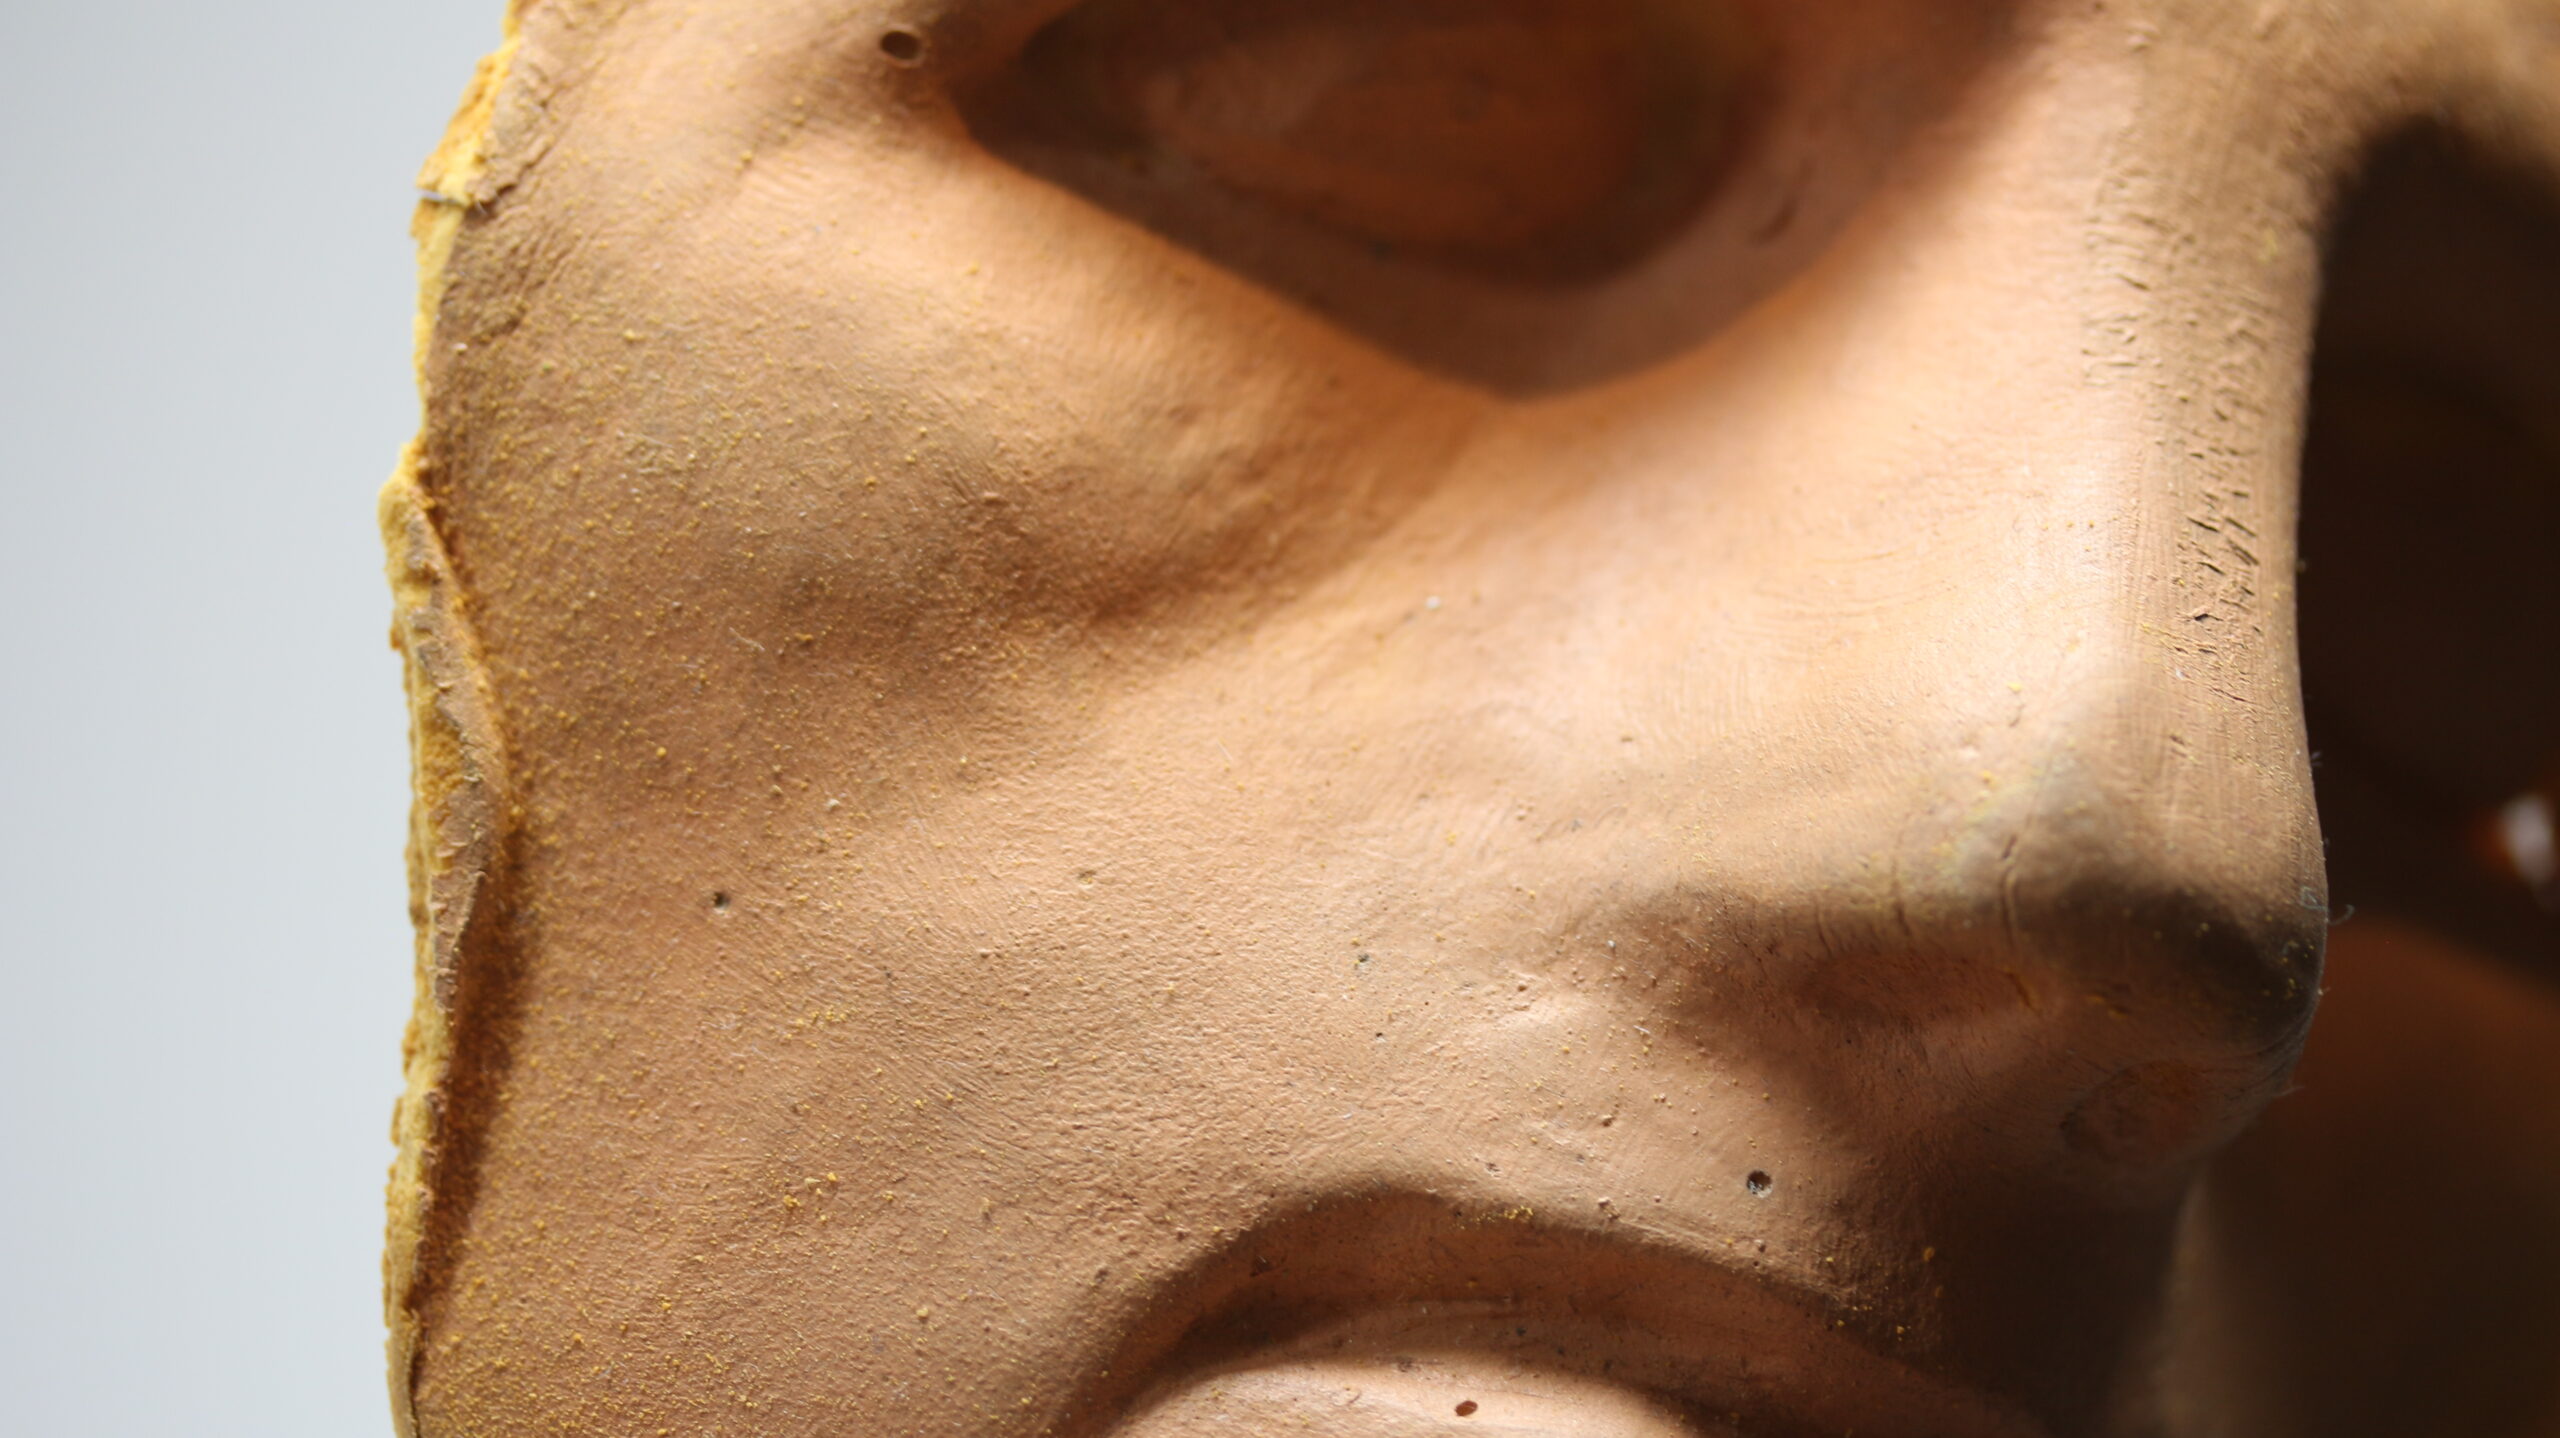
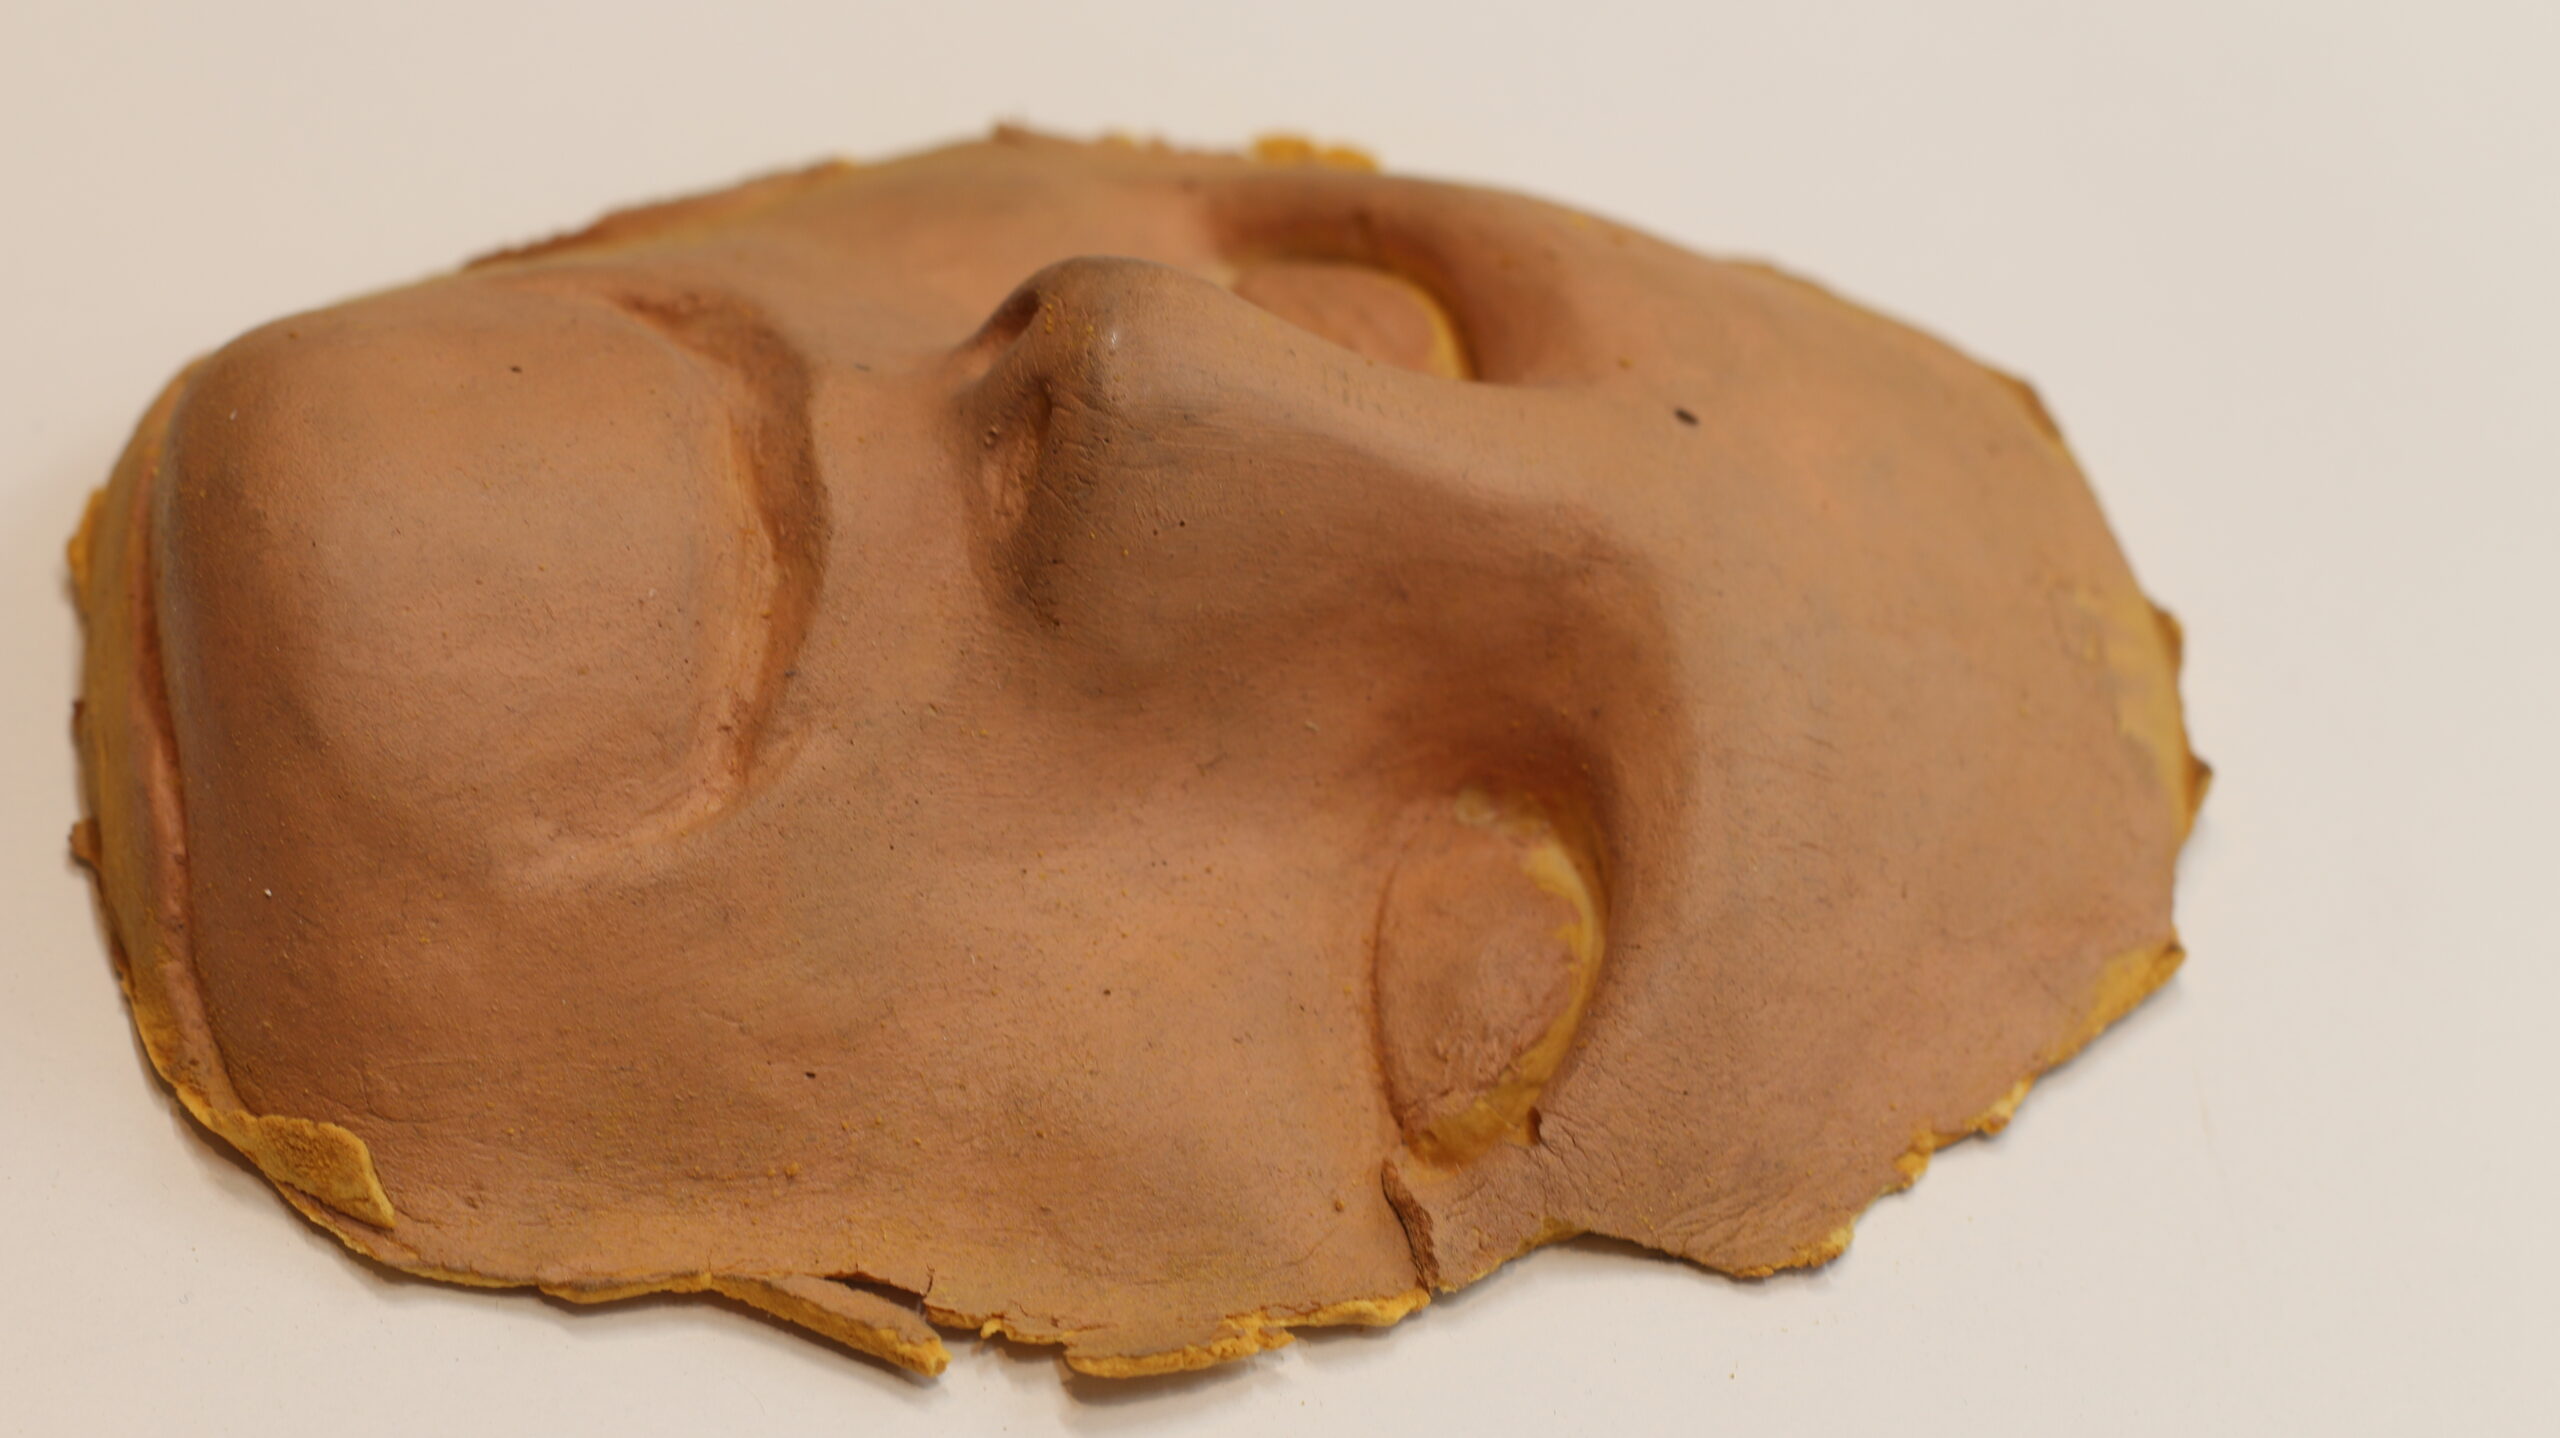
Looking over the pictures and studying the foam piece (this one I filled solid to make a foam face), I am struck with how many things were wrong with it. That I have learned enough for that to be the case is a curious thing. To review your own older work, you are in the past, present and future.
You can remember what you knew then (the past) and how you thought it should be done. You can also advise your old self on how it could be done better using the knowledge you know now (the present) and things you would attain in the future. By seeing your errors written plain, having an actual artefact from the past, you can connect with both then and now.
You also realise you will move on still from that point too.
When you think about those lessons, you can recall how often each one came, not as a gift-wrapped delight leaving a smile in its wake. Instead, each lesson is revealed as a difficult do-over. The lessons were instead wrapped in frustration, worry, wasted time and materials.
A great deal of energy is spent trying to avoid error, but doing so would only permit you to try your luck another day. Mistakes happen, and the more things you do, the more mistakes you are likely to have. As they say, the only people who don’t make mistakes are the ones who do nothing – and that is a big mistake. Or is it ‘The Person Who Never Makes a Mistake Will Never Make Anything?‘
Anyhow, you get the point.
It is fascinating to realise the changes in how things are done in the intervening years. The makeup was based on images we could get, which was not so easy as trawling the net and printing off easily found images at the time. It was a case of tracking down and buying magazines, which isn’t a huge chore but compared with the instantaneous (and free) alternatives today, it shows how much just that has changed.
The lifecast was done using Cavex CA37, the alginate of choice at my college. As I recall, Nick Dudman visited the college as a tutor and showed me how to lifecast. The face core was made in ‘Crystacal R’ plaster, and the ear cores and moulds were made in Kaffir D plaster, a yellow-coloured dental stone.
The sculpts were done using Grey Plastiline (J. Herbin brand), a staple material in the UK for years. It is available in grey and ivory colours, and several grades of firmness.

The makeup is tricky as the character lacks texture, and my understanding of overlapping pieces was scant at best. I did the face piece as a single appliance, and two flattish ear pieces I think I decided to do in slush latex rather than foam, even though I made cores and moulds for the ears as if they were to be foam. I don’t recall why I didn’t foam them, but the latex worked fine on such a static area.
I remember keeping the edges of the forehead well clear of the hairline and the piece finished under the chin. No undercuts were on the core, but I can see that I didn’t add keys. There are some keys on the ears (after a fashion), so clearly, I knew about keys, but I didn’t make the most accurate moulds.
We ran the foams at college using a Kenwood Chef mixer (this was the mixer of choice for small runs at the time). I pre-painted them using PAX paints, applied the pieces using Pros-Aide, and painted them with PAX. I think the only makeup product I had was a Kryolan ‘Supracolour B’ palette, but it is perfectly possible that I had not gotten that yet and did the whole thing in one colour of PAX paint. Looking at the piece, it is pretty even in colour.

The edges are not great, the finish shiny, and I used flash for many of the images as I knew nothing about lighting and wouldn’t have had any to use. The backdrop was a dark sheet taped to a wardrobe, and I could see so many things I did wrong. However, I also had a tremendous amount of fun and chose to come back for more.

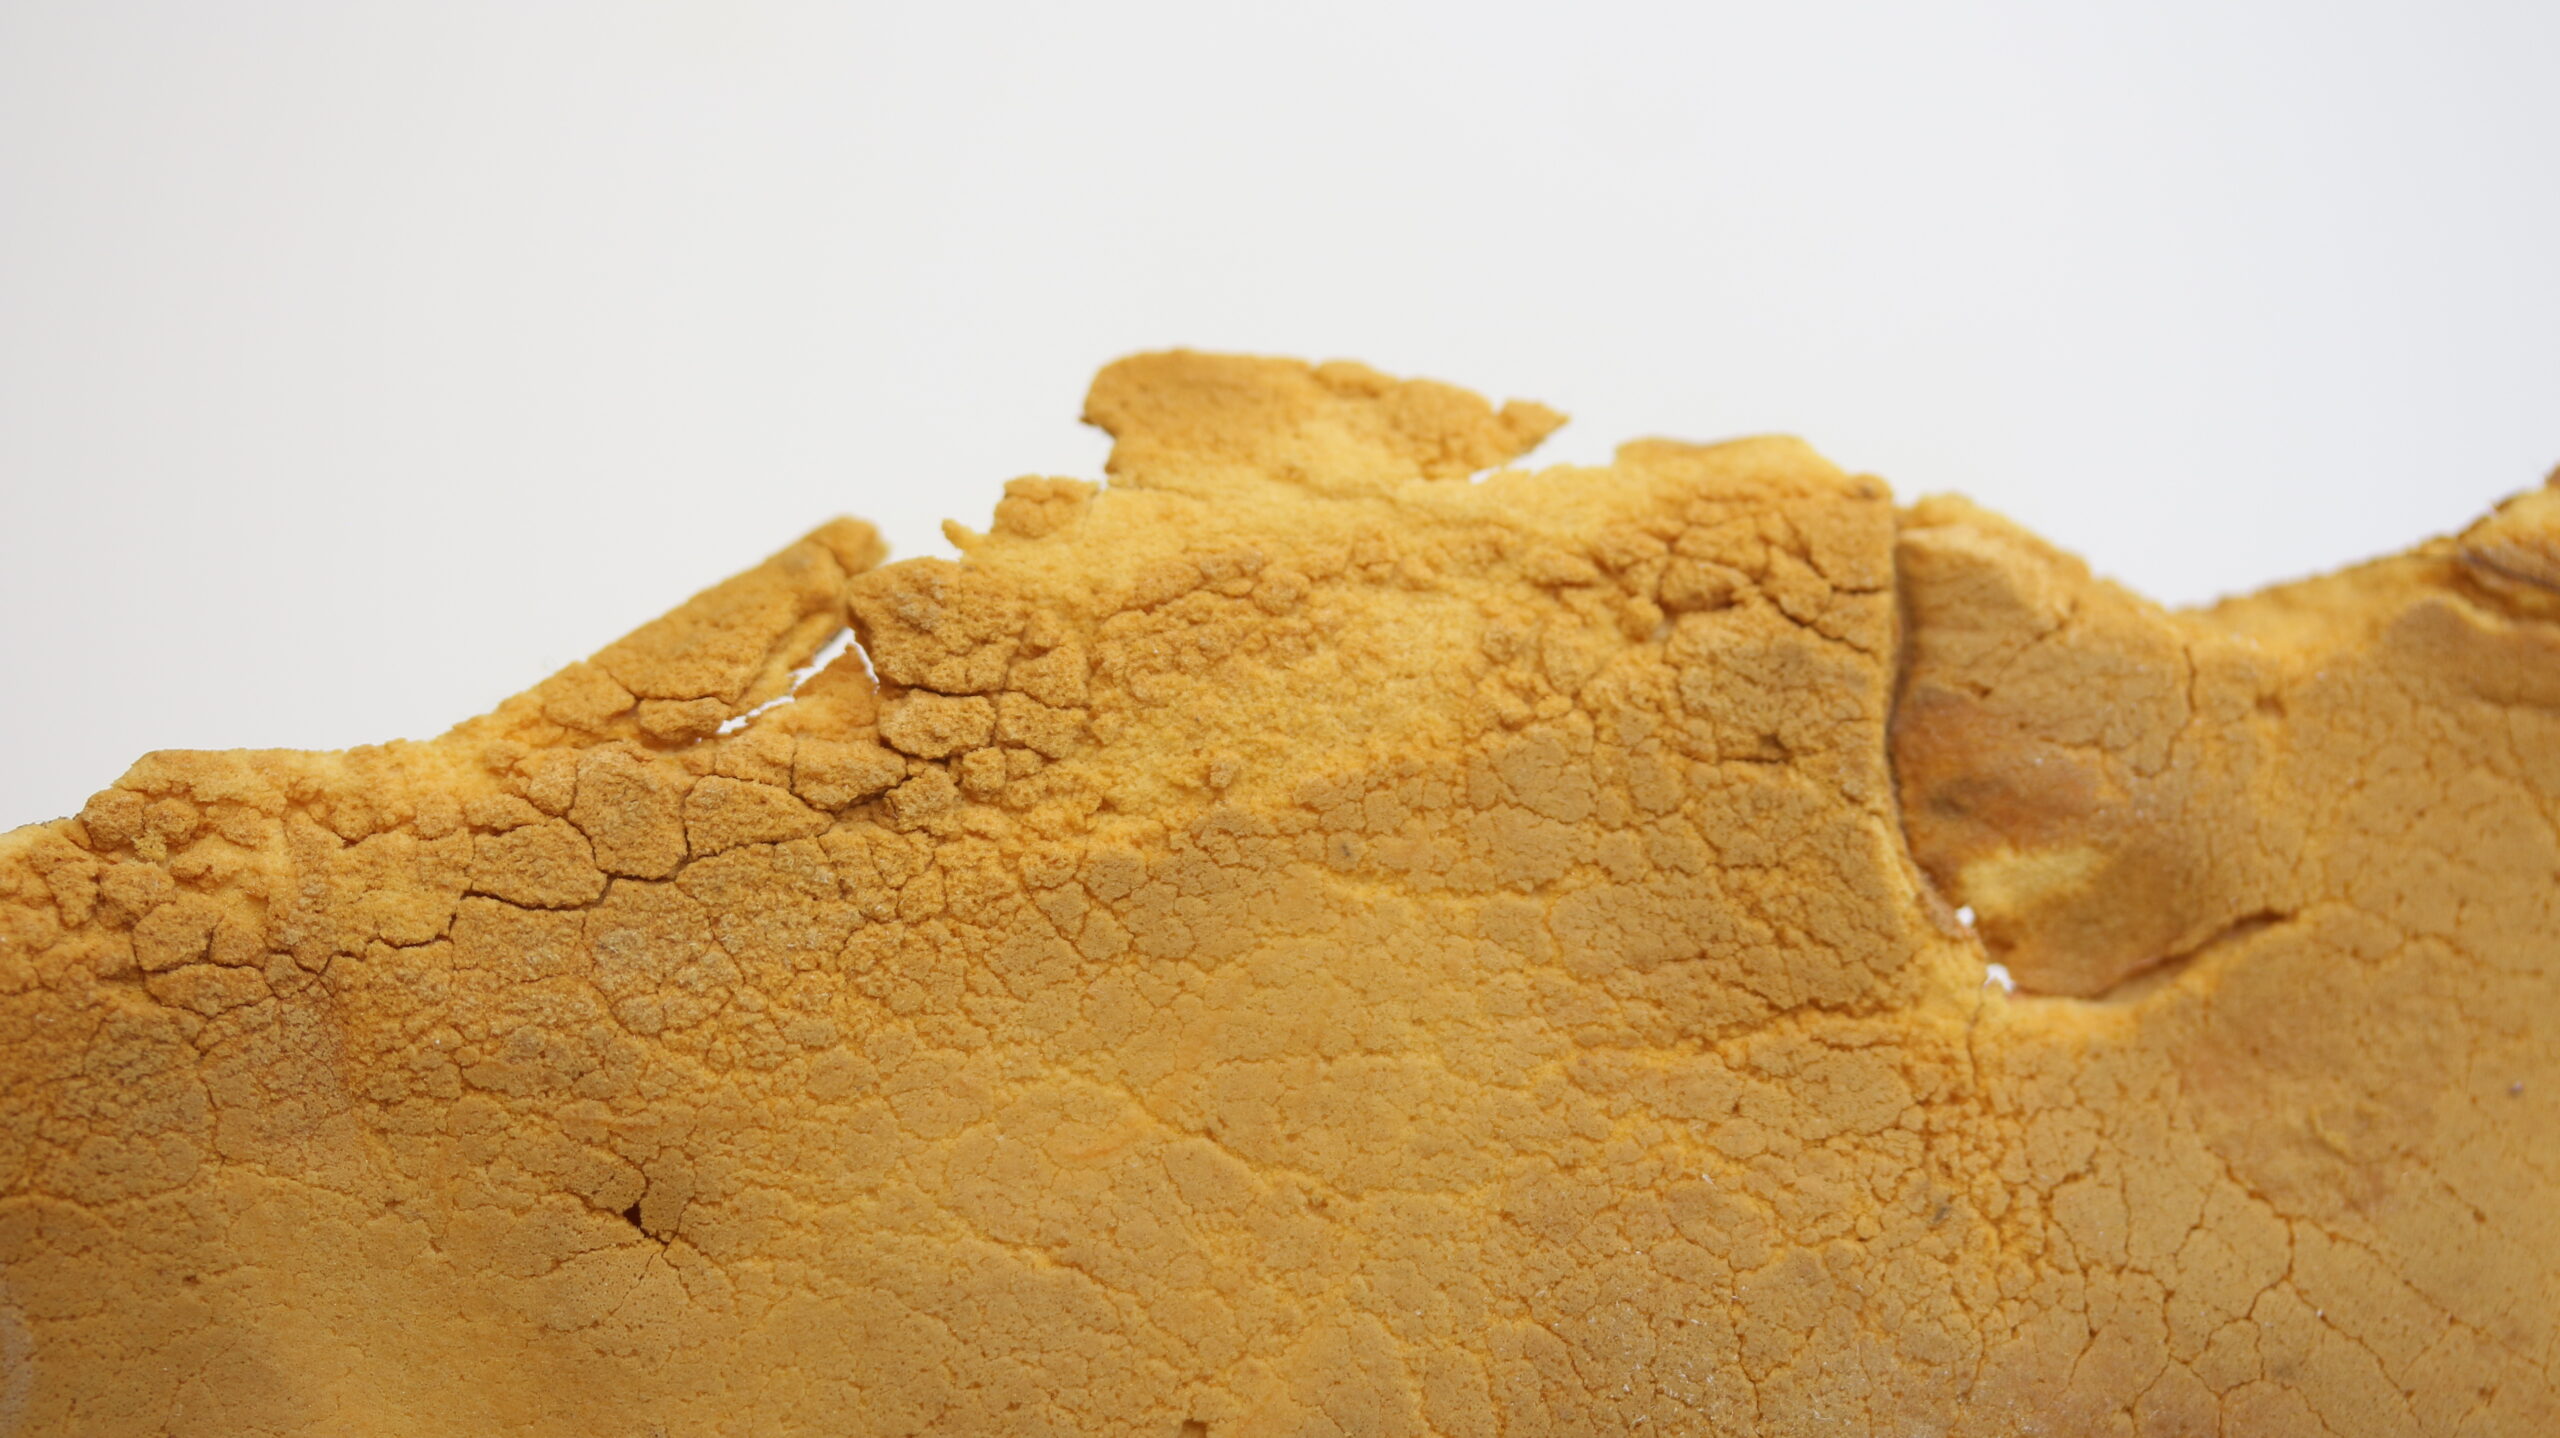
The foam piece, being almost 30 years old, is a little crispy and turning to dust. It has been well preserved, though. Despite being kept from sunlight, it still shows some curious textures as the foam breaks down gradually.
Podcast Notes
Aside from this little nostalgia piece, we had a couple of emails which we addressed in the podcast.
We start with question #1:
Hi guys,
I have been struggling with deciding how soft to make silicone pieces for different areas of the body. I’m making a cheek piece and it needs to be as realistic as possible. But I never know how to judge how much deadener I need to use for these fleshy areas that move around a lot. Previously if I make them too hard they don’t move with the body but when I make it very soft it kind of wrinkles and sags.
How soft would you make this very thin cheek prosthetic? And is there general advice on how to judge how much deadener you need for certain things?
Any advice would be much appreciated! And again thank you for all the knowledge you guys share! The podcast has saved me so many times already.
Warm regards,
Bethany
We have a more extensive response in the podcast, but this was the quick email back:
It all depends on what silicone you use, as we usually determine the softness as a numerical percentage of deadener. For example, I like Platsil Gel 25 and use LV deadener. Platsil Gel 25 is naturally a firm silicone but the ‘LV deadener’ (standing for Lower Viscocity) is the newer and more potent alternative to the regular ‘Smiths Theatrical Deadener’. If I make a squishy neck in Plastil Gel 25, then I will use about 100% LV Deadener (50g A, 50g B, and add 100g of deadener LV).
If I made the same appliance with Platsil Gel 10 with ‘Smiths Theatrical Deadener’ then I would need approx 200% of that to achieve the same softness.
As a rule for Gel 25 I use between 70-100% LV deadener. I make a test piece and take a punt on a good guess and then if it is too firm, I simply make a note and increase the deadener percentage to try again.
Appliance design is important, as a very thick piece will weigh more and sag, so maybe a foam latex appliance is better for something oversized, or even a foam insert to take some of the weight away and have only thin silicone skin over the surface. This can often be done by running the appliance in soft urethane foam, snipping the surface back and then popping this reduced foam piece back on the core and assembling the mould back on top to fill with silicone.
Ideally, the piece is as soft as the skin it will be sitting on, and that is hard to quantify numerically – it isn’t easily measured like weight or temperature. Creeping up on it with a few test pieces is the only way to be certain if that is a critical aspect.
Also in larger pieces, laying some wig lace on the core s there is no sag or stretch on the sides of the face for example is useful. That way the overall appliance is still soft, but the piece can be held without fear of endlessly stretching like warm chewing gum.
This graphic should help those who prefer a visual reference:
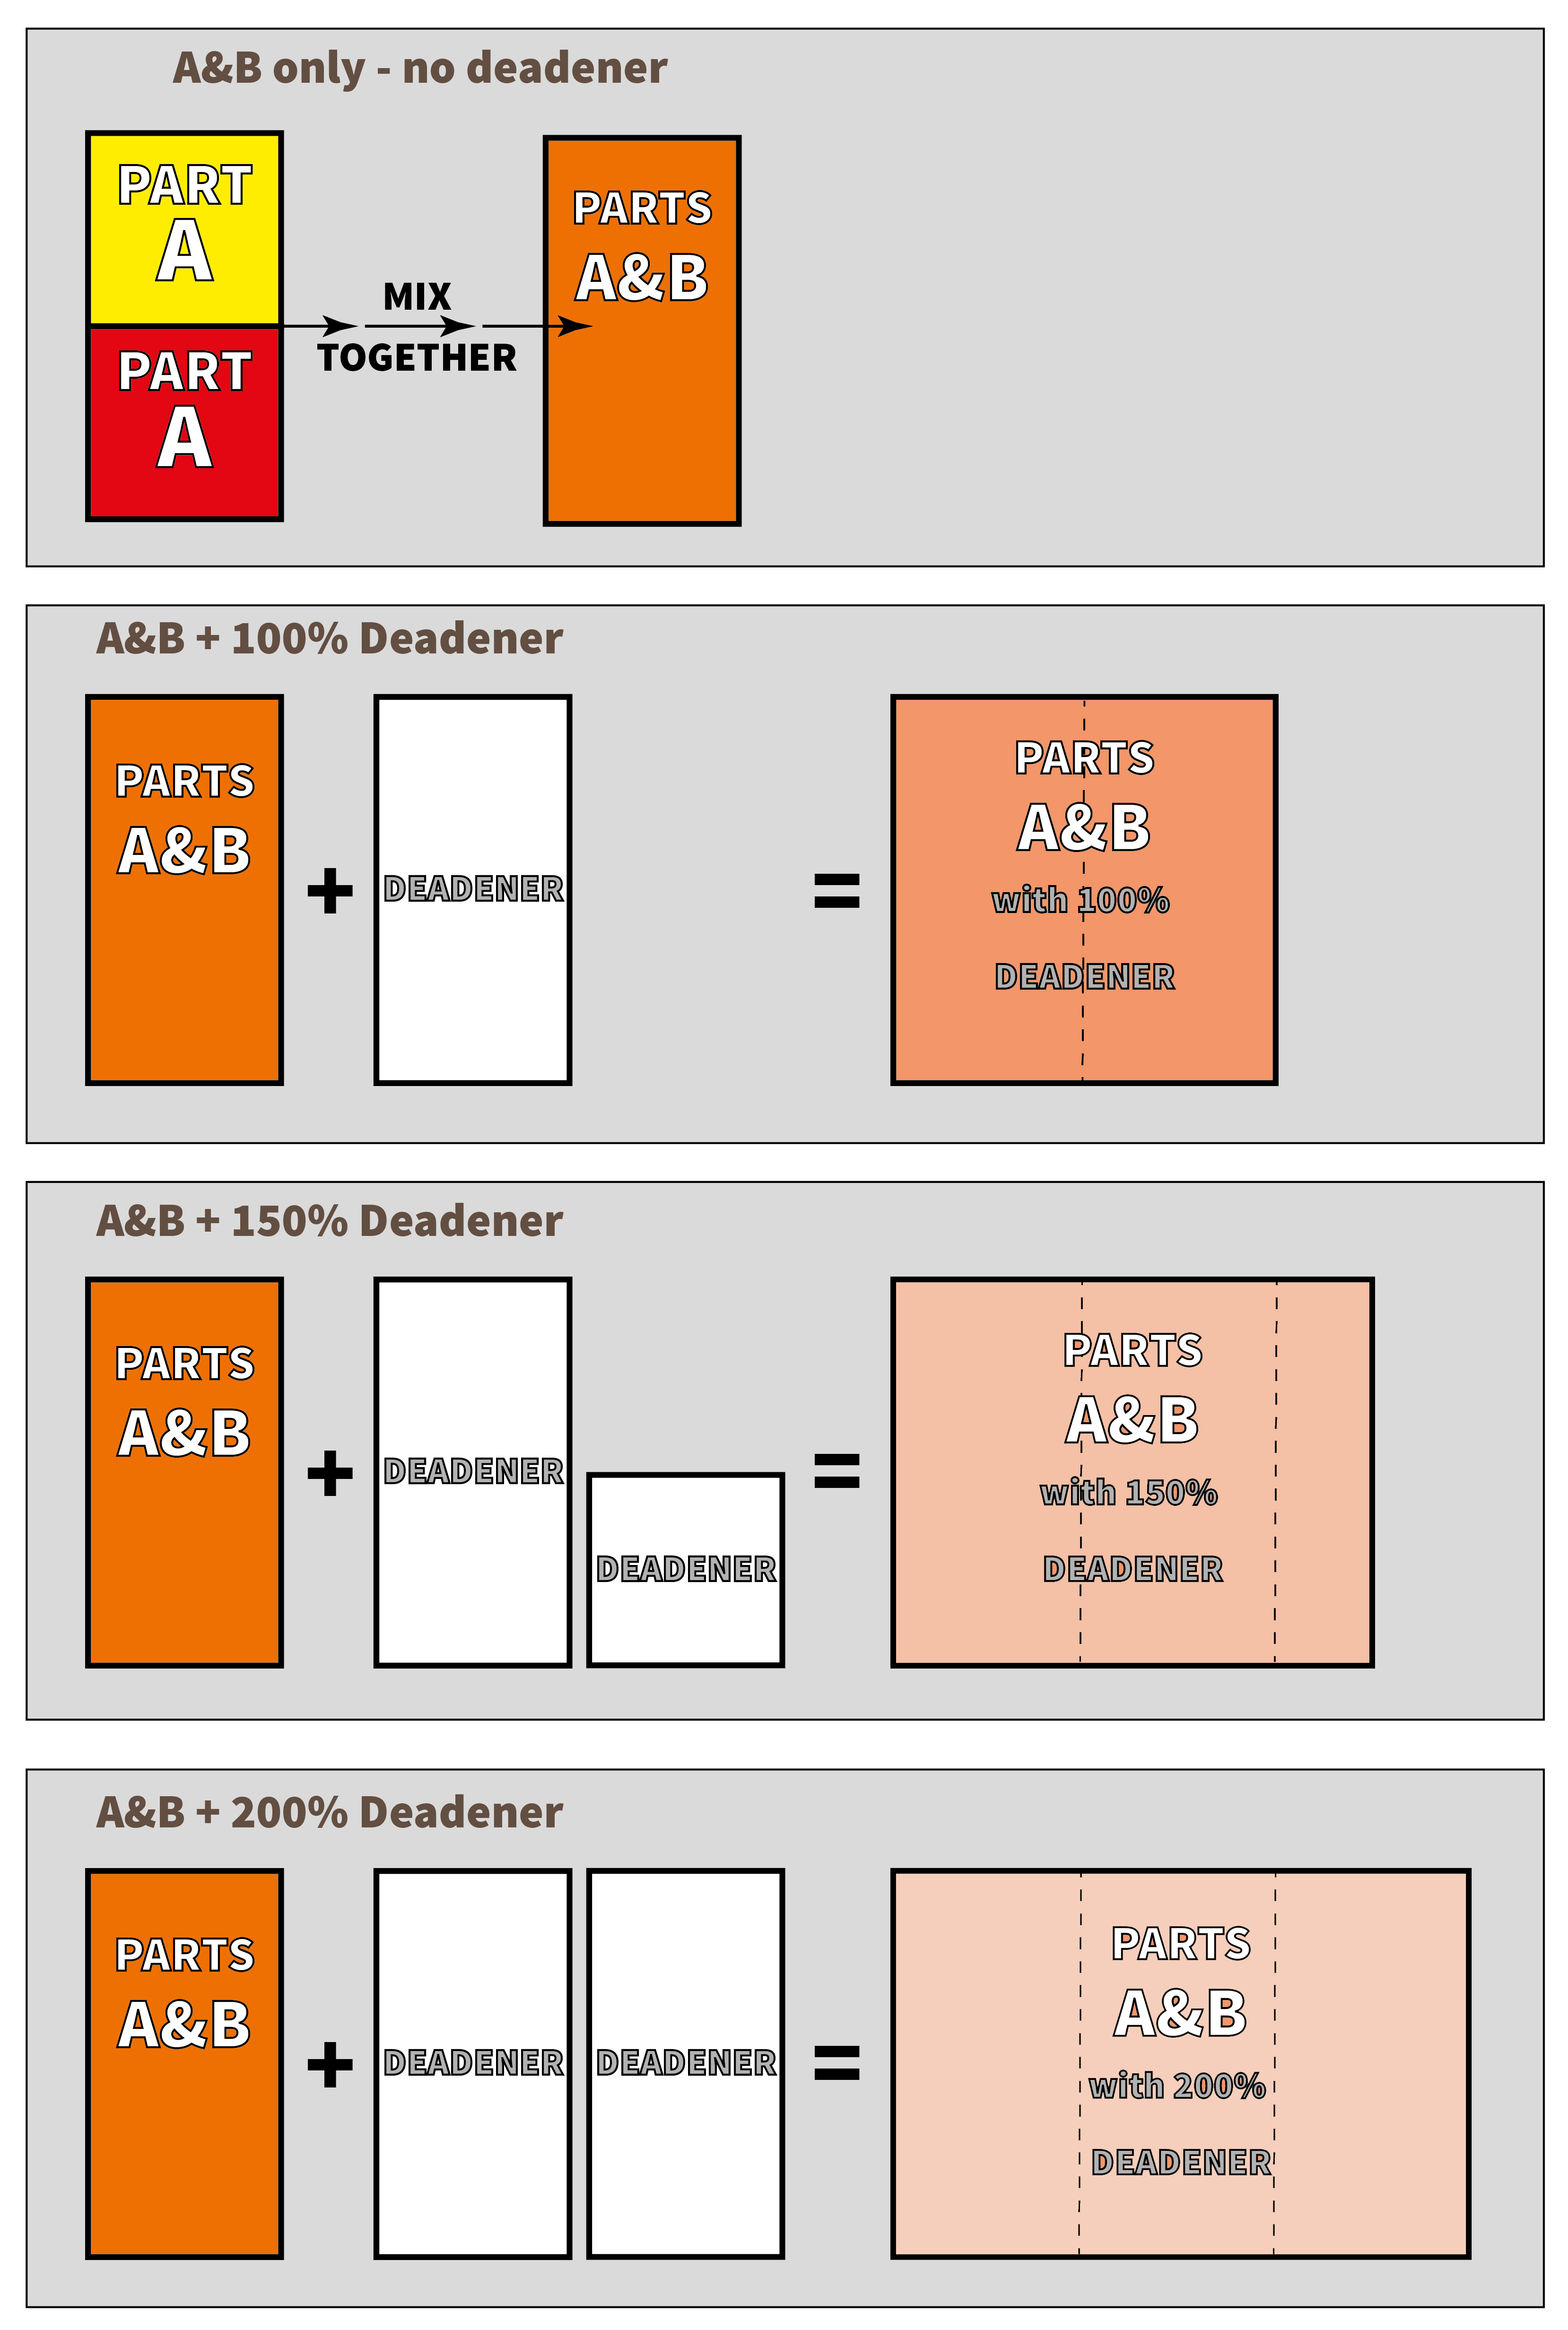
As you can see, the volume of the overall mix increases, so it is usually necessary to figure out the total volume of material required to fill your mould first (either by keeping the plastiline/clay cleaned out from the mould or test filling with the mould with water/gelatine etc.)
Then, once you know the total volume required to fill the mould, you can work out how much of that needs to be silicone and how much of it should be deadener.
Handy tools include the ‘Prosthetic silicone calculator’ https://www.makeup-fx.com/siliconemaths.htm or the ‘Silicone Softness‘ calculator at https://fxcalc.monster/. There are a load of very helpful tools there!
I am more familiar with Polytek silicones than Smooth-On products, but the same principle applies. Most folks who make appliances for a living need to have the ability to mess with the softness, much like a chef will adjust and vary ingredients. The idea of a two-part material which does everything with no thought, risk or hazard is appealing to someone starting, but I think mastery of the variables is precisely what your clients are paying for.
Question #2 – Can you take a look at my folio?
There were several emails regarding folio reviews, looking at the work itself and the idea of what a folio should contain. Whilst practice and experience will fill a lot of blanks, it is worth taking a moment to look at the contents a folio should contain.
Essentially, think first about to whom you are trying to appeal. The job of a folio is to show off your best work, not an exhaustive report on every single aspect of what you have done. The agony of choice is to decide what not to include. If you want to work for a workshop, then showing your process is an important aspect as they will likely want to see your design and brief, armature, sculpt, mould, cast including seamlines, and finishing process (how you build up the paint layers etc., precurling hair, mixing on a hackle and making eyes/teeth etc.).
These things may be interesting and in-depth, so a folio could contain a few choice images of each project without bogging down the viewer with endless pages of similar images. Have a separate folio with that in-depth stuff on standby, so should they request more information about a particular aspect, you have it ready for a deep dive.
If you are looking to appeal to production directly, where YOU are the workshop, and they are the one looking for an artist, then the process side of things is less important to them than the finished work, price and timeframe.
Regarding what should be in the folio, a lot of it may be from a college or makeup school when starting, and we talk a bit about the sameness of much of it. Seeing ambitious creatures which are smothered in horns/teeth.tentacles/spikes/eyeballs etc., are all well and good (we LOVE creatures!)…
…BUT…
…a workshop will see lots of these, and what these larger makeups don’t demonstrate is subtlety, refined work which works with a mostly untouched face. Covering a head in rubber may seem like a show of force, but a realistic nose tip which looks completely believable is something your employer would likely be very happy to see. A few benchmark makeups show the mastery of materials and process, showing that you know the two biggies: getting great edges and matching skin tones.
Prove that you can do these. Include makeups which have a baldcap and a realistic nose/chin. A few character makeups that look like you could walk past them in the street without raising attention are good ways to show mastery of the craft.
Seeing endless huge witch noses or pig snouts, although well made, can still appear as makeup simply because nobody has a 6-inch long pointed nose or a pig snout. By all means, do these things as good makeups, but don’t forget to include clean, realistic character work if you want to appeal to a workshop doing that kind of stuff.
Those clean, realistic makeups do not grab attention on Instagram because they look unremarkable. Smear some blood on something, and everyone raves about it. It catches more attention, and we get it. However, the few who will pay you to do stuff know what to look for, and if you can make a set of subtle cheek pieces blend in flawlessly, then it’s already a good bet you can do a stab wound or pair of horns. For this reason, we ask folks to consider more noses in their folio and perhaps fewer horns.
We believe in making small things well and scaling up as you grow. Making a nose badly and then documenting the process will quickly reveal the things you don’t know for little money. Then seeking help and addressing the problems will allow you to repeat the process better. You will gradually refine it and learn everything every appliance maker is scared of without laying out a lot of money on a huge creature. You’ll get to that when you are good and ready.
Our episode #21, called ‘Allen Hopps: Scaremaster‘ had great points about not constantly upscaling the ambition without doing the work on the small stuff first. We like to champion the work because you have to pay your dues if you want to be good. If you just want praise, you’ll probably find it, but praise doesn’t pay the bills. If you want to do this for a living, you need to be good enough to solve the problems of someone willing to pay you. Think about who you can serve and how best to do that. I mean, that is how you assess your bigger purchases, right?
Many thanks, as always, for your time checking the stuff out. You can email us directly at stuartandtodd@gmail.com or leave us a voice message on our site.
If you enjoy this podcast and got something out of it, would you do us a solid and tell just one more person about us? Send them a link and help us grow!
–Stuart & Todd
To listen to the podcast, you can stream or download from here, or simply subscribe through your favourite podcast app – we are on many, including Spotify, Apple Podcasts, Soundcloud, IHeartRADIO , STITCHER , Luminary and Google Podcasts.
 #85 – Bill Corso